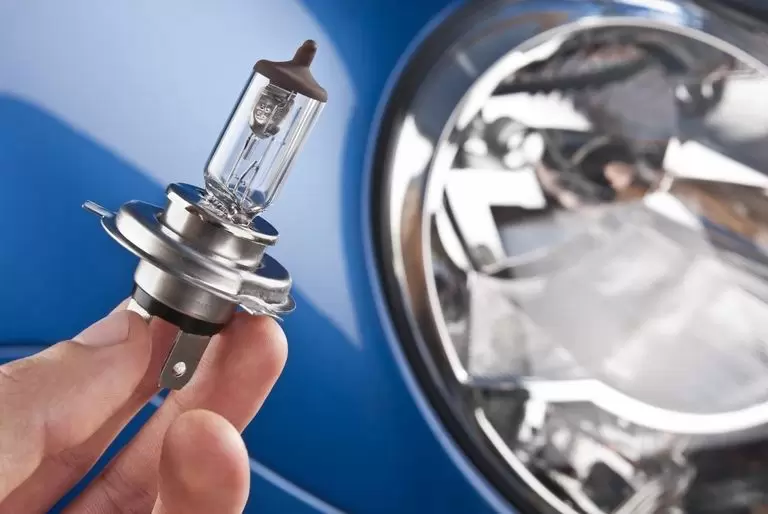
Upgrading to LED headlights is a smart choice for car enthusiasts and daily drivers alike. LED headlights offer better illumination, energy efficiency, and a modern look compared to traditional halogen bulbs. Fortunately, installing LED headlights is a straightforward DIY project that you can complete with basic tools. In this guide, we’ll walk you through the process step by step, ensuring that your installation is both safe and efficient.
Why Choose LED Headlights?
LED headlights are becoming increasingly popular due to their numerous advantages:
- Brighter and Clearer Light: Produces a white or bluish light that enhances visibility.
- Energy Efficient: Consumes less power compared to halogen bulbs.
- Longer Lifespan: Typically lasts up to 50,000 hours, significantly longer than halogens.
- Cooler Operation: Generates less heat, reducing the risk of damage to the headlight housing.
- Modern Aesthetic: Gives your car a stylish and contemporary look.
Whether you’re looking to upgrade for aesthetic reasons or improved safety, LED headlights are an excellent investment.
Tools and Materials You Will Need
Before starting the installation, gather the following tools and materials:
- LED Headlight Bulbs: Ensure they are compatible with your car model.
- Gloves: Prevents skin oils from contaminating the bulbs.
- Screwdriver Set: To remove headlight housing.
- Socket Wrench: For securing bolts.
- Dielectric Grease: To protect electrical connections.
- Zip Ties: For cable management.
- Owner’s Manual: To locate headlight components.
Pro Tip: Choose LED headlights from reputable brands to ensure quality and longevity.
Step 1: Prepare Your Car
- Turn Off the Engine: Ensure the car is parked on a level surface.
- Disconnect the Battery: Unplugging the negative terminal prevents electrical accidents.
- Let the Headlights Cool Down: Avoid touching hot bulbs to prevent burns.
Safety First: Always wear gloves to protect your hands and avoid touching the bulb directly.
Step 2: Access the Headlight Housing
- Open the Hood: Use the release lever inside the car.
- Locate the Headlight Assembly: Refer to your car’s manual for the exact position.
- Remove the Cover: Some cars have a plastic or rubber dust cover protecting the headlight assembly.
- Unplug the Wiring Harness: Carefully disconnect the old bulb from the socket.
Pro Tip: Take a picture before disassembling to remember how components fit back together.
Step 3: Remove the Old Bulb
- Release the Bulb: Turn the bulb counterclockwise to unlock it from the socket.
- Gently Pull Out: Carefully extract the old halogen bulb.
- Inspect the Socket: Check for any dirt or corrosion. Clean if necessary.
Note: Do not touch the glass part of the bulb with bare hands, as oils can cause hot spots and premature failure.
Step 4: Install the New LED Bulb
- Fit the LED Bulb: Insert the new bulb into the socket.
- Twist to Lock: Turn clockwise until it securely fits.
- Connect the Driver: If your LED kit includes a driver or ballast, connect it between the bulb and the original socket.
- Secure the Wires: Use zip ties to keep the wiring tidy.
Important: Make sure the LED bulb aligns correctly. Improper alignment can result in poor beam focus and reduced visibility.
Step 5: Test the Headlights
- Reconnect the Battery: Attach the negative terminal.
- Turn on the Headlights: Check for proper functioning.
- Adjust Beam Pattern: LED headlights often have a more focused beam, so ensure they are aimed correctly.
- Check Both Low and High Beams: Make sure both settings work as intended.
Troubleshooting Tips:
- Flickering Lights: Indicates a voltage issue; consider using a CANbus adapter.
- Dim Output: Recheck connections and ensure the bulb is seated properly.
- One Side Not Working: Swap bulbs between sides to check if the issue is with the bulb or wiring.
Step 6: Reassemble the Housing
- Reattach the Cover: Ensure a snug fit to prevent moisture entry.
- Secure the Assembly: Use screws and clips to hold the housing in place.
- Test Again: Check the lights after fully reassembling to ensure everything works correctly.
Tips for Optimal LED Headlight Performance
- Use Dielectric Grease: Apply a small amount to connections to prevent corrosion.
- Regular Cleaning: Dust and dirt on the lens can reduce light output.
- Check Alignment Periodically: Improper alignment can blind other drivers.
- Avoid Overloading the Circuit: Ensure the LED kit’s wattage is compatible with your car’s electrical system.
Legal Considerations in India
- Headlight Intensity: LED headlights should comply with Indian automotive lighting regulations.
- Beam Pattern: Make sure the headlights are not too bright, as this can dazzle oncoming traffic.
- Color Temperature: Keep the color within the legal range (usually between 4300K and 6000K).
Failure to adhere to these guidelines may result in fines or legal issues.
Advantages of DIY Installation
- Cost Savings: You can save on labor charges by doing it yourself.
- Customization: Choose the right LED bulb temperature and brightness according to your preference.
- Satisfaction: Successfully installing LED headlights yourself can be a rewarding experience.
Final Thoughts
Upgrading to LED headlights is a great way to enhance your car’s lighting performance and aesthetics. By following this DIY guide, you can ensure a safe and effective installation without the need for professional help. Remember to choose quality bulbs, follow safety measures, and adhere to legal regulations.
By investing a little time and effort, you can enjoy the benefits of brighter, more energy-efficient headlights on your next drive. If you encounter any issues or need professional assistance, visit a trusted car service center for expert advice.

